

No Haunted House would
be complete without at few tricks to startle the visitors. Being on the
Halloween-l has been a great help in learning how to make things go bump in the
dark! Now props are the things that give detail to the haunt. We have collected
store bought props for years, and now we build a lot of the stuff we use. One
of the great things is taking a common object and with a few tweeks here and
there getting a great prop.
On this page we hope to show you pictures of some of the props being made and
used. Also how some of our very amature special effects are put togther. Come
back often as things are built we will post them to the page.

Here are a few of the simple props getting started.

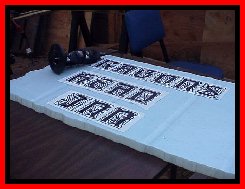
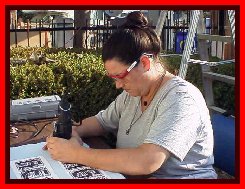 We took a piece of the blue foam and carved in the name of the Inn. Then
we vacu formed a dragons head and put them together with some paint.

Here is the finished sign. We again added moss and silk ivy to make it blend
in with the facade.

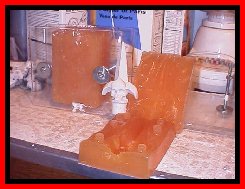 The cemetary fence that we we given had skull
tips on the posts. We were lucky enough to borrow the molds and have been making
new tips. Here are the molds, and one of the finished parts.


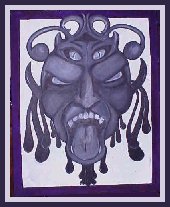
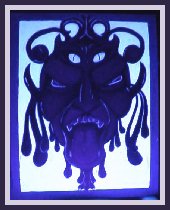
We have a friend that has great talent. We asked her if she could make
us some strange pictures in regular light, but even stranger in Black Light. Here
is the first of her creations. On the left is the painting under normal light,
and on the right the black light. I will try to get the effect of both lights
on it at the same time...it gives it a very 3D look!

Props are a very important part of the whole Haunt. The local paper came
out and did a article on the haunt so we ad to set up a scene for them to shoot.
We grab some props, masks, costumes, and a little fog and set up the cemetary
below.

 Here is the photographer and Mistress Scary!

After looking for a stuffed owl for the cemetary and finding out that they
are few and far between (plus illegal to have in a few states) we followed a
idea we saw Karl Fields use. We took a plastic owl for scaring birds and took
it apart. We hot glued several bags of feathers on it.

We than added some moss on the base and attached the head to a Christmas Tree
turner that Bob McGowan gave us. Instead of adding LED's to the eyes we cut out
the plastic behind the eyes and inserted a yellow light. This looked great shining
through the eyes as the head turned back and forth.


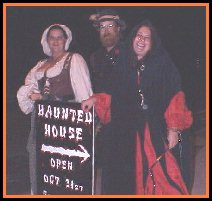
 Kim and I worked to get a sign for the haunt. We wanted people
to really notice it as they drove down the road. We not only placed the sign on
the corner but any of the crew that wanted to take a break got to stand on the
corner and wave!
 Here is the sign all finished.

 In our deadly tavern set we wanted a cocktail of a different
type. Kim told us about a product you can purchase in the plant section. It is
a crystal that obsorbs water. So we took the wine glass and added some water, once
the substance started jelling we dropped in two soft plastic eyeballs. It gave
a great effect with a skeleton hand around the base.

Lauren did a second GITD painting for us. I had a image that was borrowed off the
web. She took the first frame and the last and created the drastic change.


We set the painting up on the wall across from a normal light. On the ceiling
in the hallway were two 4ft Black Light bulbs. The normal light was on a dimmer switch
that let it slowly fade on and off. As you stood and watched the painting the
normal lamp slowly dimmed and the black light took over. The change was slow and
really caught a lot of attention.


 The cemetary fence that we we given had skull
tips on the posts. We were lucky enough to borrow the molds and have been making
new tips. Here are the molds, and one of the finished parts.


 Kim and I worked to get a sign for the haunt. We wanted people
to really notice it as they drove down the road. We not only placed the sign on
the corner but any of the crew that wanted to take a break got to stand on the
corner and wave!
 Here is the sign all finished.

 In our deadly tavern set we wanted a cocktail of a different
type. Kim told us about a product you can purchase in the plant section. It is
a crystal that obsorbs water. So we took the wine glass and added some water, once
the substance started jelling we dropped in two soft plastic eyeballs. It gave
a great effect with a skeleton hand around the base.


